The idea behind Resource Profiles
It might seem a good idea to let certain Tenants use certain clusters or nodes. Thus when a Tenant creates a VM, that VM will be created on that specific cluster. But Proxmox has a limit in terms of cluster sizes and that is around 30 nodes. And maybe there is an other reason that you have multiple clusters. Lack of room in a region, completely different hardware, storage full. You name it. So not very flexible.
So how did we create a solution that sees all clusters as one pool, and give you the control to tell where requested resources should land, who uses what and how with only 1 page of settings?
The answer: Resource Profiles (RP)
An RP is a place where you configure how clusters and nodes are deployable. There are two places where you can edit RP's and there is a hierarchy.
A Resource profile is only used when creating a new VM.
A change in any RP wil NEVER change running VM's!
It is basically just rule book used when creating new VMs
Default Resource Profile (DRP)
This is the mother of all Resource Profiles. What you configure here will be used inless overriden at an other level. You can find it in the menu on the left at Settings > Default resource profile
Everything you configure here is the default for new Tenants. If you would enable self registration of Tenants, they can start creating VM's right away while you know for sure they will be created according the settings you enforce.
Limiting CPU, memory, storage and amount of VMs
Go to the Default Resource Profile page. Here you can start with selecting how you want limits for CPU, memory, storage and amount of VPS-es are handled.
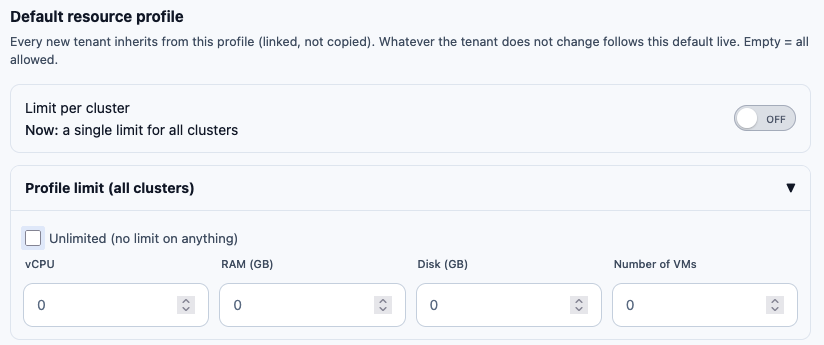
If you choose limit per cluster, depending on where a VM is created, the limit of that cluster is applied, rather than the limit of the Tenant. This way you can force that a cluster will never be overloaded.
By default this value is disabled an you can set a default Profile limit. This limit is then used for all Tenants (unless overriden at a specific Tenant). The default is unlimited.
Settings per cluster
Go to the Default Resource Profile page. There you will see that a cluster can be used in three ways
- Not at all. The cluster is there, maybe it has VM's on it, but new VM's will not be created on it
- Shared. When a VM is created, and auto select is enabled, Cloudmox will look for a node in all shared clusters that fits best with the needed capacity for the new VM
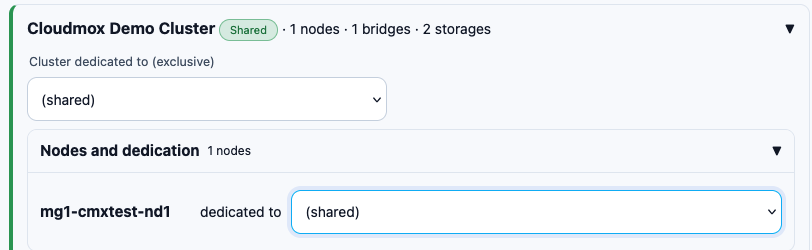
- Sssigned to one Tenant. Alle VMs of that Tenant will be created on this cluster.
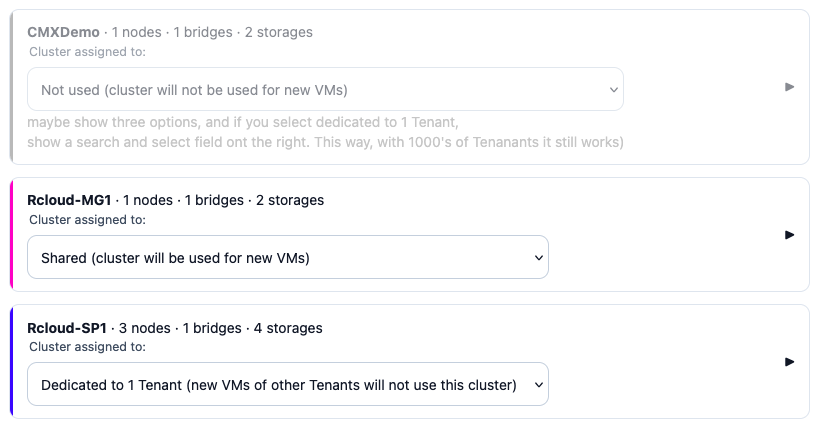
You will also see that you can dedicated one single node to a Tenant. This way you have one cluster to manage while you could offer dedicated nodes to a single Tenant.
Bridges
Go to the Default Resource Profile page and open the settings of a single cluster. Choose Bridges.
A cluster can have multiple bridges, each bridge with his own settings. Here you can set how the interface should be shown during creation of a VM.

If you do not select any bridge, all will be available!
Keep in mind, if some Proxmox admin would add an interface, it can be used by Tenants, regardles if it is an interface intended for storage, internal or heartbeat.
Storages
Go to the Default Resource Profile page and open the settings of a single cluster. Choose Storages.
You can have multiple storages with different roles. Per storage you can limite the IOPS and set SSD and Discard flags. And you can give the storage a friendly name.
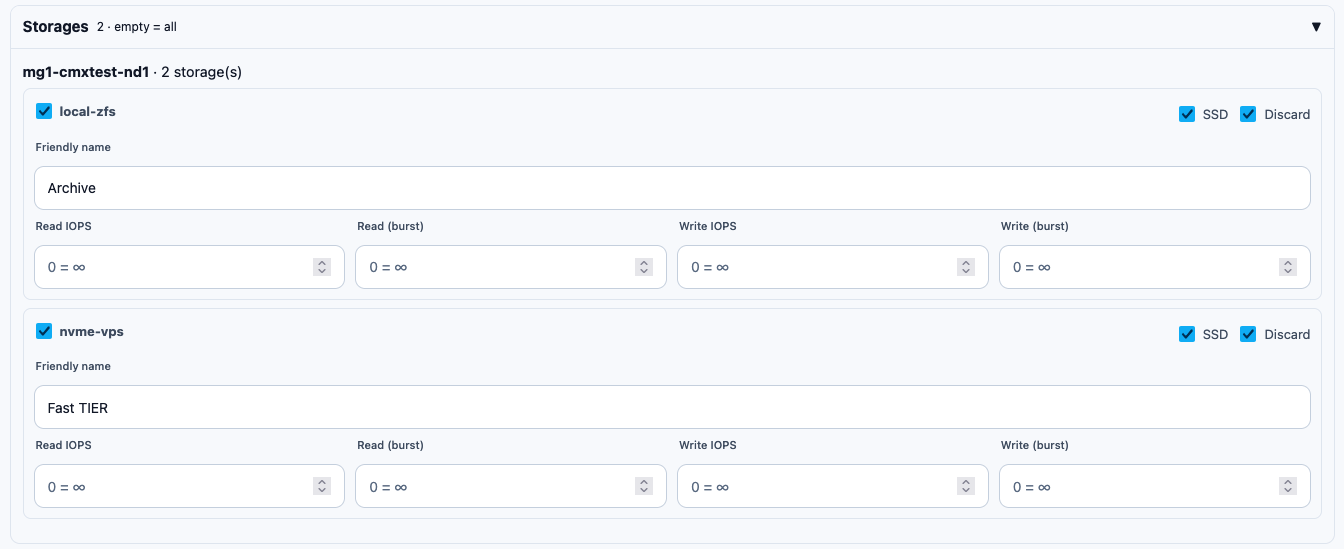
If you do not select any storage, all will be available!
Keep in mind, if some Proxmox admin would add storage, it can be used by Tenants. If it is not suited for VM storage, that will result in an error.
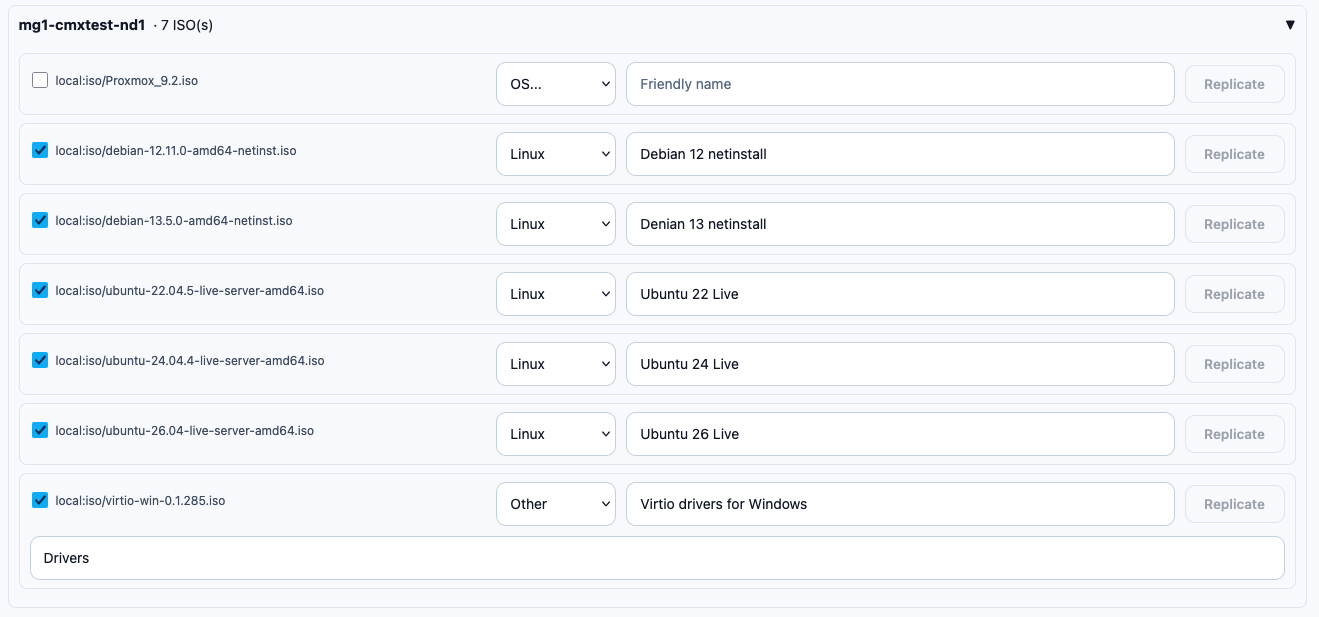
ISOs
Go to the Default Resource Profile page and open the settings of a single cluster. Choose ISOs.
Cloudmox uses the ISO images you have available in Proxmox. In the DRP you can give those ISOs a name and select the OS. This will set the OS selector in Proxmox when creating a VM.
If you have multiple nodes, the replicate button will populate these settings over all nodes.
Tenant Resource Profiles (TRP)
If you have created a Tenant, you can see the RP the Tenant uses. If you open that, you will see it looks exactly the same as the Default Resource Page. You do not have to change settings, but if this Tenants needs other settings, you can set them here.
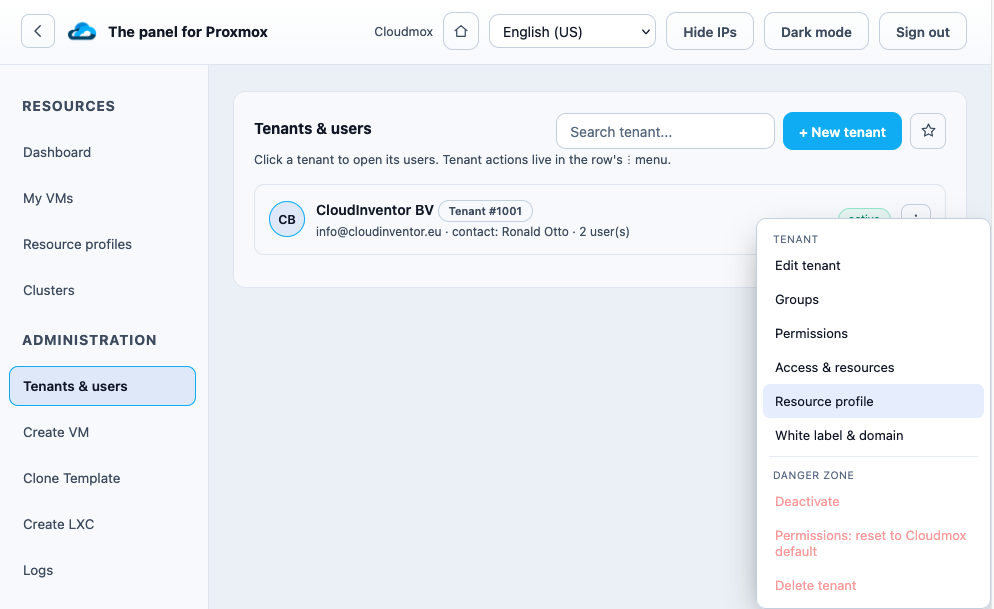
Changes in the Resource Profile at a Tenant level will overwrite the Default Resource Profile settings for this Tenant only!