Install license
After installation, you need to install a license. If you do not have a license, please get one here
The key we supply is active as from the order date. If you have a 15 day trial, day 1 is the day we provide the key. Same with bought keys.
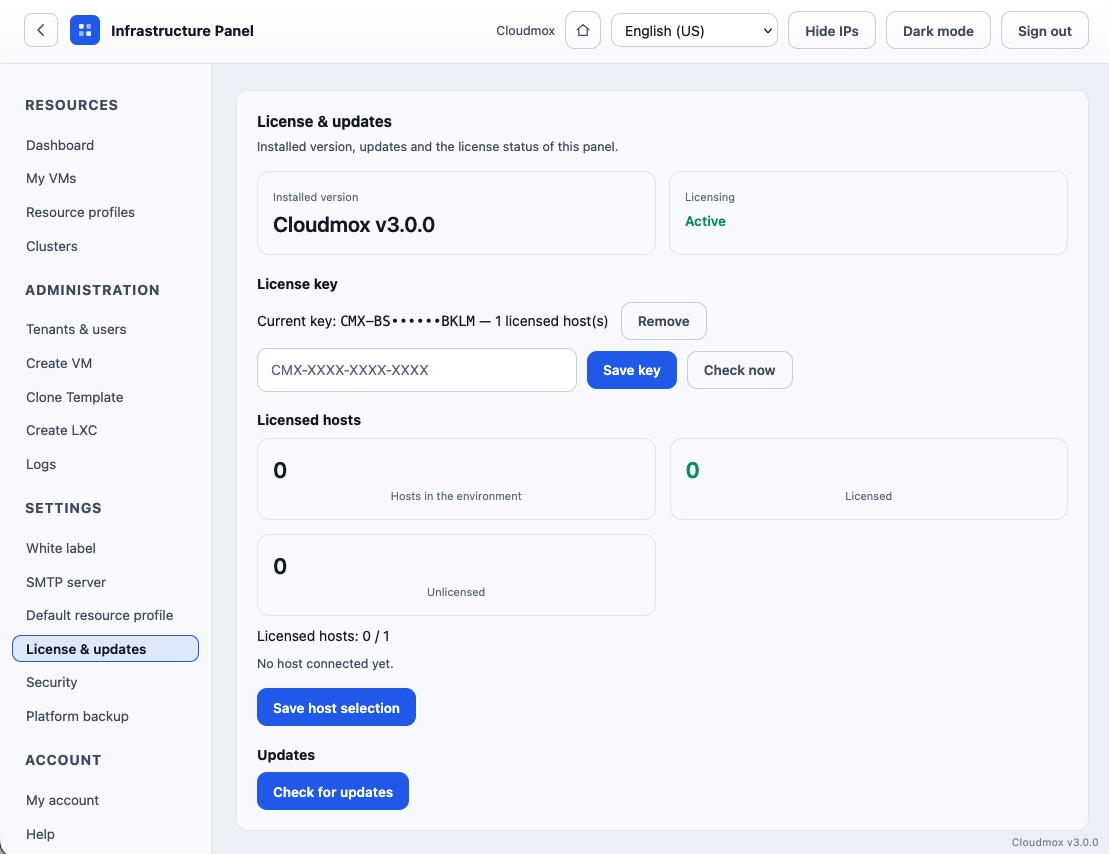
If you have a license key (starts with cmx) do the following:
- Login to your Cloudmox installation
- In the menu on the left go to Settings > License & updates
- Paste your license key in the field and click save
- Select the nodes you want to use in Cloudmox
Update
Make sure you are running the latest version.
- In the menu on the left, go to settings > License & Updates
- Click on, Check for updates
- If there are updates, update.
Setup mailserver
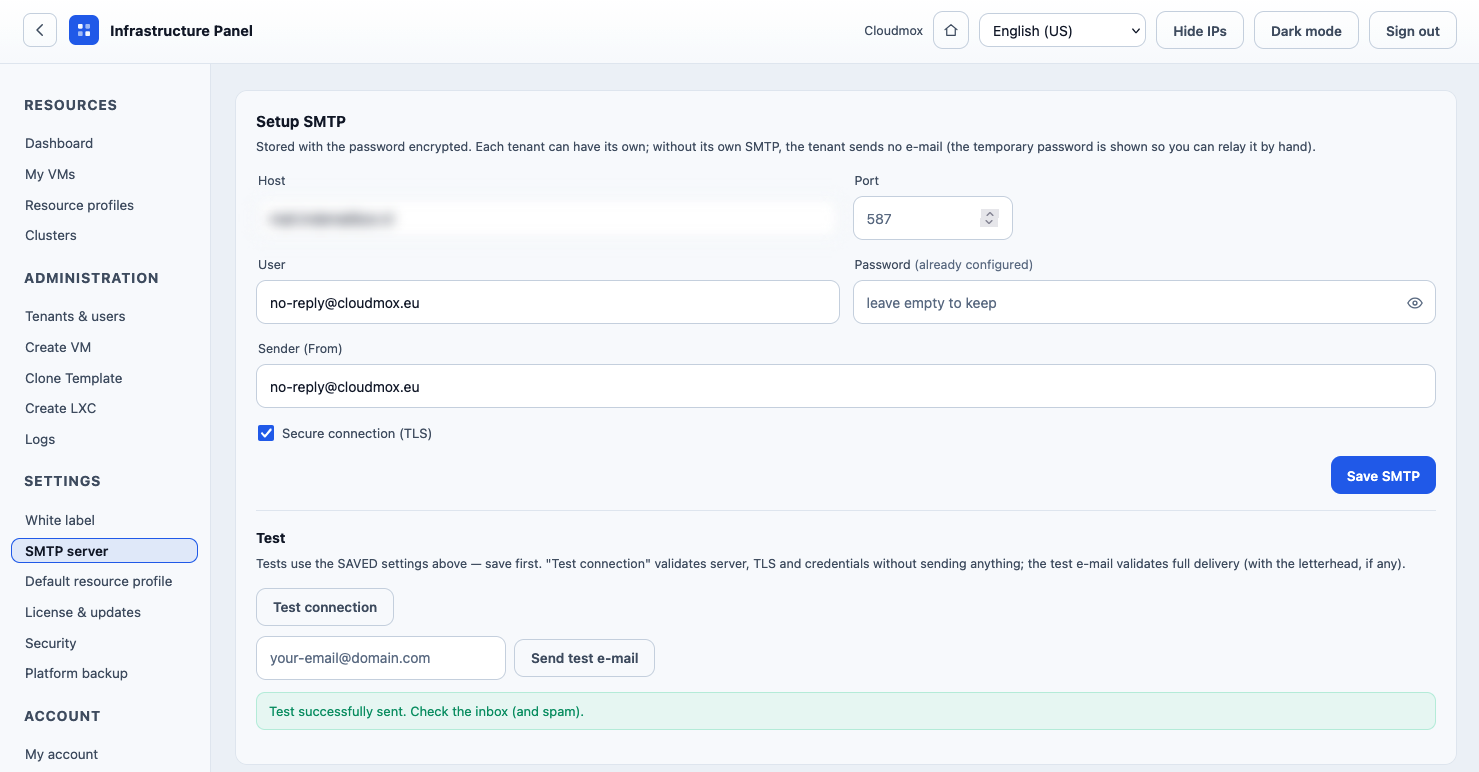
You need to setup an SMTP server to enable mailing to users for account creation and monitoring notifications. This can be done as followes:
- Login to your Cloudmox installation
- In the menu on the left, go to Settings > SMTP server
- There you can fill out credentials
This way, since you mail with an account, no spf, DKIM or any other anti spam settings are needed.
The Sender (from) address should be a valid sender addres. Replies will not end up in Cloudmox but in the mailbox of the senders address. no-reply can be used.
Branding and whitelabeling
You might want to set your own colors and logo's. For that we created the White label page.
- Login to your Cloudmox instance
- Go to Settings > Whitelabel
There you can set as many colours and logo's as you like.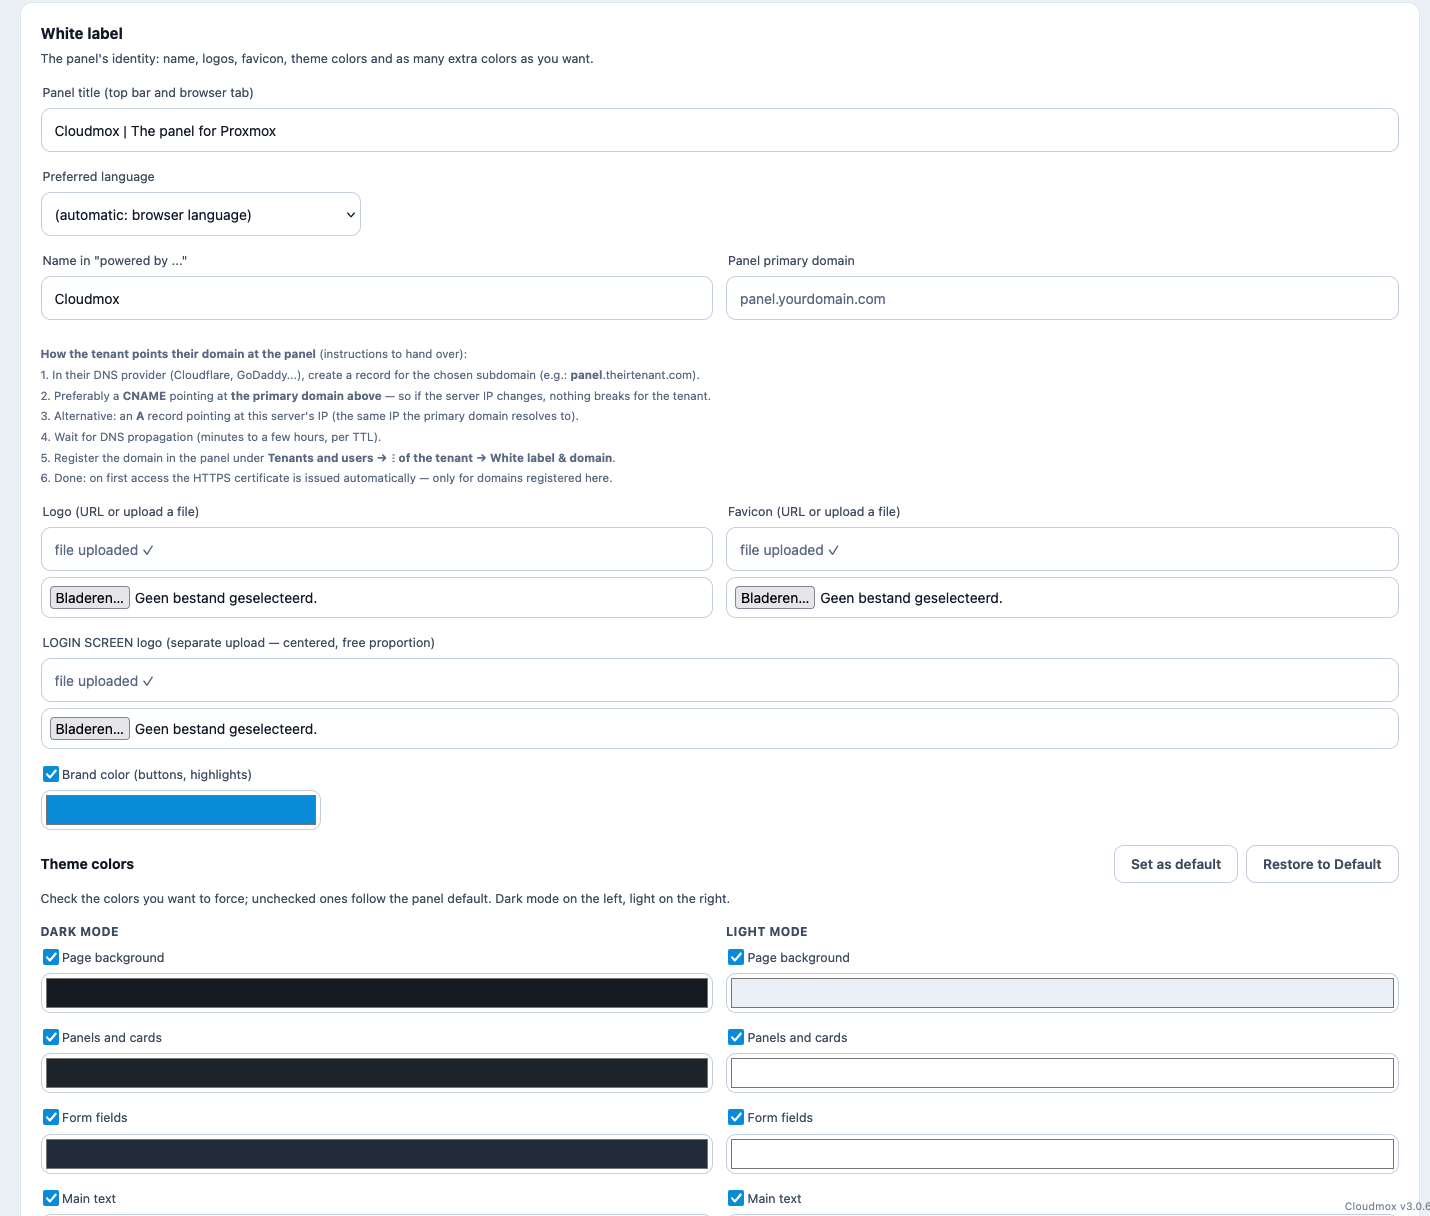
White labeling can be done per Tenant. To do that, go to a Tenant and select White label there. A tenant can even use his own domain!
Create access key in Proxmox
Before you can add your cluster, you need API credential for Proxmox. Cloudmox uses only the API of Proxmox. So there is no need to install anything.
Create access key in Proxmox
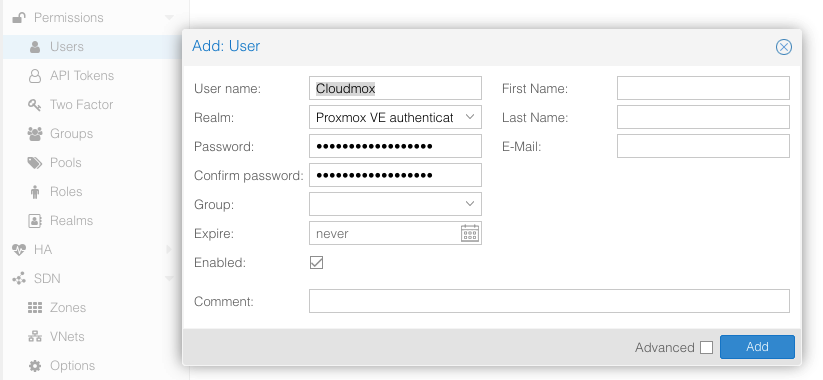
Create a dedicated user
- In the left menu, open Datacenter > Permissions > Users.
- Click Add
- In the username type: Cloudmox
- in Realm pick Proxmox VE authentication server (pve)
- set a password
- Click add
Grant permission to the user
- Go to Datacenter > Permissions
- Click the Add and choose User Permission
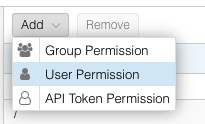
- In Path choose / (the root)
- In User choose cloudmox@pve.
- In Role choose PVEAdmin
- Check Propagate
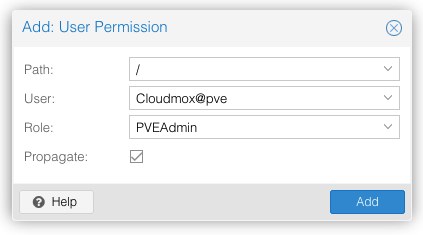
- Click add
The PVEAdmin role already covers listing nodes and VMs, power on and off, opening the console, creating VMs, snapshots and backups. If any action later shows as denied, change the role to Administrator.
Generate the token
- Go to Datacenter > Permissions > API Tokens and click Add
- In User choose cloudmox@pve
- in Token ID type cloudmoxpanel
- uncheck the Privilege Separation box (so the token inherits the user permissions)
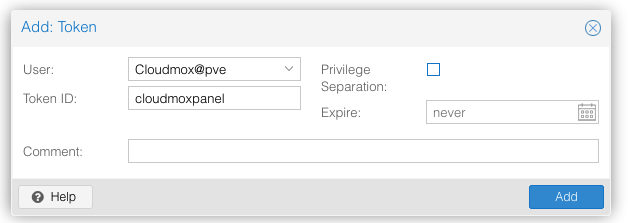
- Click Add
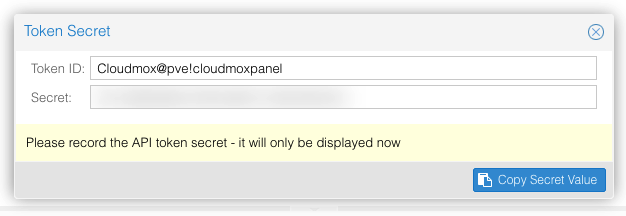
Proxmox shows the Token ID (like cloudmox@pve!panel) and the Secret (a long string). Copy both now; the Secret is shown only once.
- Store the Token ID and the Secret somewhere safe. You will paste them into the panel later. The Secret appears only once!
Certificates
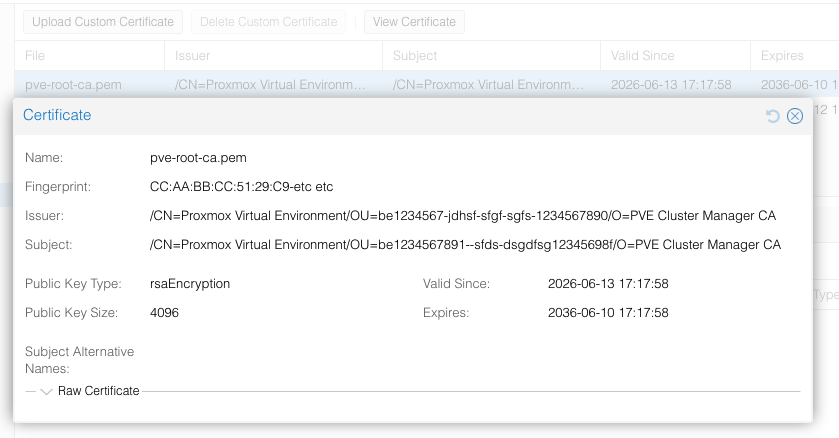
If you do not have a valid certificate for your Proxmox environment, we might need the fingerprint.
- In Datacenter, click your node > System > Certificates. Note the Fingerprint (SHA-256).
- Select pve-root-ca.pem
- Click on View certificate
- Save the Fingerprint
Port protection
If you have blocked traffic to 8006 In the Proxmox firewall, allow port 8006 to from your Cloudmox VPS-es IP address.
Adding the cluster to Cloudmox
Before you can connect a cluster, you need API credentials from your Proxmox cluster. Do that first: Create Access key in Proxmox
- In the panel, go to Clusters and click Connect cluster
- In API URL field, enter the Proxmox address of your Proxmox server with the port: https://YOUR-PROXMOX:8006
- In Token ID, paste what you created in the chapter Generate token. (e.g. cloudmox@pve!panel)
- In Secret, paste the token secret that you got in the same chapter
- Paste the certificate Fingerprint that you stored in that chapter, so the panel confirms it talks to your real Proxmox
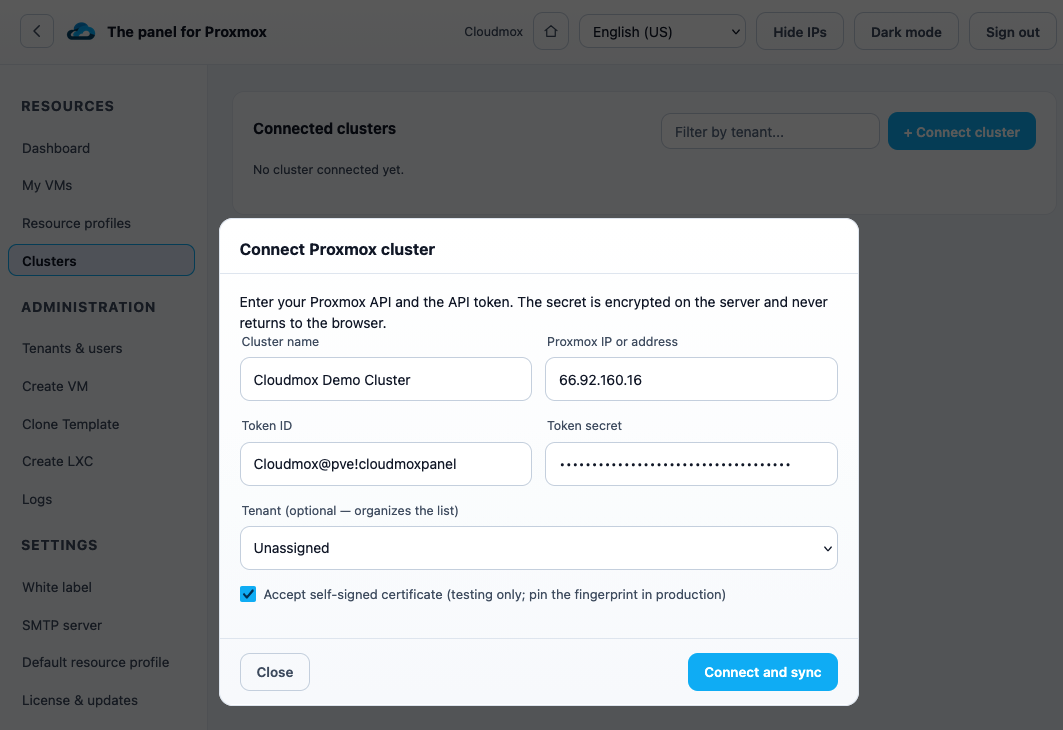
- Click Connect
The panel validates and syncs nodes and VMs on its own.
And you are done!
Your VMs appear under My VMs. Remember, you are a super admin. You can see all VM's (they might not be yours!)
Configure usage of cluster
For this we have the Default Resource Profile. This is a key element of Cloudmox and changes the way clusterresources can be used.
In Cloudmox you can connect multiple clusters while the Tenant sees them as one. That requires that you have a way to configure how storage, networking and ISO's should be used per cluster. Thus, when a VM is created, the cluster is selected and the fitting configuration is fetched. The VM will always be configured according the settings of that cluster!